How to Polish Acrylic: Easy Steps to Restore Perfect Clarity
Aetheris Concepts Editorial TeamWhy Knowing How to Polish Acrylic Matters
Acrylic furniture brings a sleek, modern charm that instantly brightens any space — but keeping it crystal-clear takes care and attention. Over time, tiny scratches, smudges, or a hazy film can dull its shine and make even the most elegant pieces look tired. That’s why knowing how to polish acrylic is essential. With the right approach, you can restore its signature transparency, preserve its beauty, and extend the life of your favorite acrylic items.
In this complete guide, you’ll learn everything you need to know — from how acrylic behaves as a material to detailed step-by-step polishing methods for different levels of scratches. You’ll also discover expert cleaning techniques, aftercare routines, and practical maintenance tips to keep your furniture looking flawless for years to come.
Understanding Acrylic Furniture and Its Surface
Before we dive into polishing, it’s important to understand what makes acrylic different from glass or plastic.
Acrylic (also known as Lucite or Perspex) is a lightweight, durable thermoplastic that looks like glass but is much stronger and shatter-resistant. However, it’s softer than glass, which means it’s more prone to surface scratches and cloudiness over time.
When you polish acrylic, you’re essentially refining its surface by removing tiny imperfections — revealing a smooth, glossy layer underneath.
Why Acrylic Loses Its Shine Over Time
Acrylic can become dull or scratched due to:
- Regular dusting with rough cloths
- Using harsh cleaners or chemicals (especially ammonia-based)
- Friction from objects placed on the surface
-
Exposure to UV rays or high humidity
Understanding these causes helps you prevent damage before it happens — and polish more effectively when needed.
Signs That Your Acrylic Furniture Needs Polishing
Not sure if it’s time to polish your acrylic furniture? Look for these telltale signs:
- Dull or cloudy appearance – The surface looks hazy or matte instead of crystal clear.
- Fine scratches or swirl marks – Often caused by improper cleaning or wiping with paper towels.
- Smudges that won’t go away – Even after cleaning, some streaks remain trapped beneath a worn layer.
-
Yellowish tint – This could indicate oxidation or UV exposure.
Pro Tip: Always inspect your acrylic under natural light to spot dull patches or micro-scratches more easily.
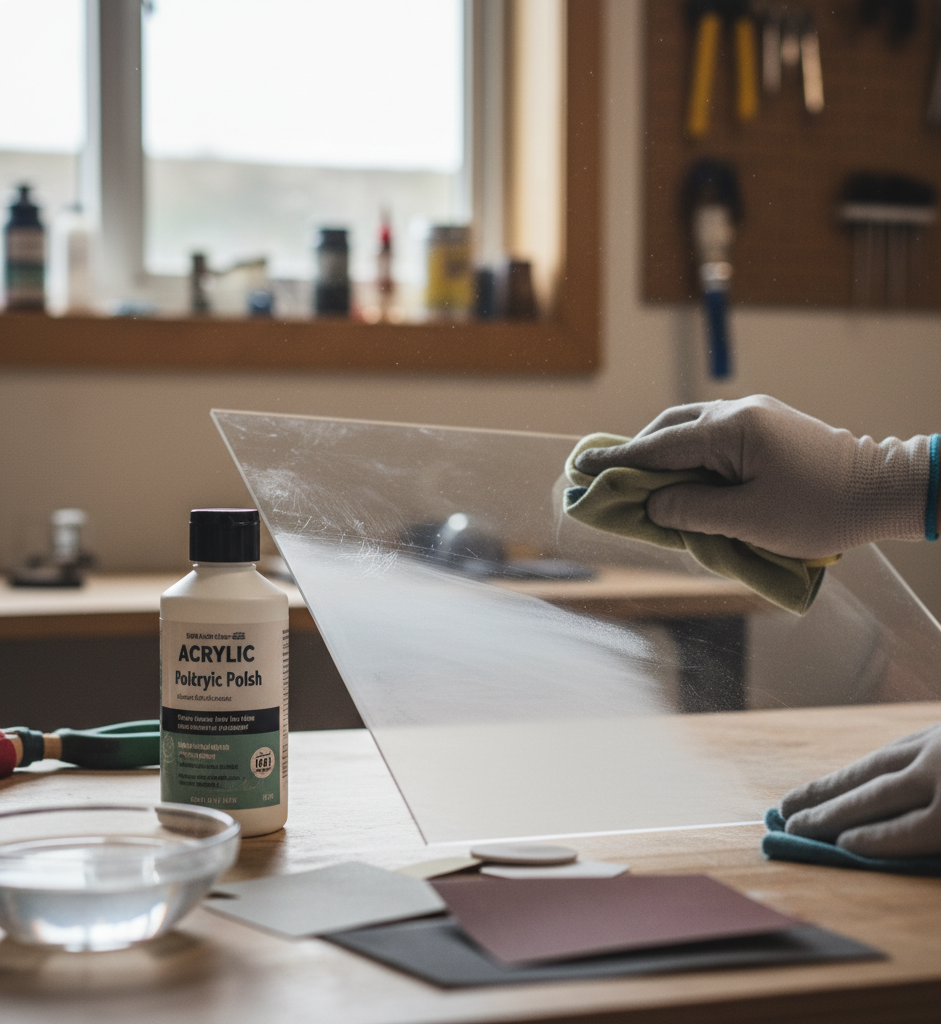
What You’ll Need to Polish Acrylic
Before you start polishing, gather the right tools and materials. Using the correct products ensures you won’t damage the surface.
Materials List:
- Microfiber cloths – For cleaning and buffing (avoid cotton or paper towels)
- Mild soap solution – Gentle dish soap diluted in warm water
- Acrylic cleaner – Specialized formulas like Brillianize or Novus Plastic Clean & Shine
- Polishing compound – Such as Novus #2 Fine Scratch Remover or Meguiar’s PlastX
- Sandpaper (optional) – 600 to 12000 grit for deeper scratches
- Electric buffer or polishing pad – For large surfaces
- Soft sponge or applicator pads
- Lint-free towels

How to Polish Acrylic: Step-by-Step Process
Now, let’s get into the step-by-step instructions on how to polish acrylic safely and effectively.
Step 1: Clean the Surface Thoroughly
Before polishing, make sure your acrylic surface is completely clean.
- Mix a few drops of mild dish soap with warm water.
- Dip a soft microfiber cloth into the solution.
- Wipe the acrylic gently in circular motions to remove dust and dirt.
-
Rinse with clean water and dry using a dry microfiber cloth.
Avoid using Windex or ammonia-based cleaners — these can cause the acrylic to haze or crack over time.
Step 2: Assess the Surface Damage
Once the surface is clean, inspect it under bright light.
- Light scratches or dullness: You can use an acrylic polish directly.
-
Deeper scratches: You may need to sand before polishing.
- Severe damage: Consider professional refinishing.
Step 3: Apply Acrylic Polish
- Apply a small amount of acrylic polish to a clean microfiber or foam applicator pad.
- Gently rub it over the surface using small, circular motions.
- Continue until the polish starts to dry or haze.
- Buff with a clean microfiber cloth until the surface shines.
If you’re using a power buffer, set it to a low speed and move slowly to avoid overheating the acrylic.
Step 4: Removing Deeper Scratches (Optional Sanding)
For visible or rough scratches, sanding can help restore the surface before polishing.
- Start with 600-grit wet/dry sandpaper and soak it in water.
- Sand gently in straight lines, keeping the area wet.
- Move to finer grits (800 → 1200 → 2000 → up to 12000) to smooth the surface.
-
Wipe clean and reapply acrylic polish to restore shine.
Tip: Always sand in one direction per grit, then switch directions when moving to a finer grit to ensure even polishing.
Step 5: Buff and Finish
After polishing, use a clean, dry microfiber cloth to buff the surface in circular motions. Continue until you see a uniform, mirror-like finish.
You’ll notice your acrylic furniture looking crystal clear — almost like glass, but lighter and more durable.
Assessing Scratch Severity Before You Polish
Before diving into the polishing process, identify the type and depth of scratches your acrylic piece has. This determines which method and materials you’ll need.
|
Scratch Type |
Visual Description |
Polishing Difficulty |
|
Light Scratches |
Barely visible under bright light, no rough texture |
Easy |
|
Medium Scratches |
Noticeable lines but not deep, may feel slightly rough |
Moderate |
|
Heavy Scratches |
Clearly visible and can catch a fingernail |
Advanced |
|
Deep Scratches |
Deep gouges, opaque appearance, or surface distortion |
Complex (may require repair) |

How to Polish Acrylic with Light Scratches
Light scratches are the most common and easiest to fix. These usually come from routine cleaning, wiping dust, or setting lightweight items on the surface.
Materials You’ll Need:
- Mild dish soap
- Microfiber cloths
- Acrylic cleaner (e.g., Brillianize or Novus #1)
- Fine polish (e.g., Novus #2 Fine Scratch Remover)
-
Soft foam or cotton pad
Step-by-Step Process:
-
Clean the Surface:
Wipe the acrylic using a mixture of mild soap and water. Remove any dust or debris before polishing. -
Apply Acrylic Polish:
Put a small amount of Novus #2 or similar polish on a foam pad. Rub gently in circular motions across the scratched area. -
Buff to Shine:
Once the polish starts to haze, use a clean microfiber cloth to buff it off. Move in consistent circular strokes until the acrylic regains its clarity. -
Optional:
Finish with Novus #1 (Clean & Shine) to add a protective anti-static layer that repels dust.
Pro Tip: Avoid pressing too hard. Light scratches respond best to gentle friction and polishing repetition rather than force.
How to Polish Acrylic with Medium Scratches
Medium scratches are more visible and may feel slightly rough to the touch. These typically occur from accidental scuffs, cleaning with rough cloths, or frequent object movement.
Materials You’ll Need:
- Acrylic cleaner or mild soap solution
- Microfiber towels
- Polishing compound (Novus #2 or Meguiar’s PlastX)
- Optional: 800–2000 grit sandpaper (wet/dry)
-
Water for wet sanding
Step-by-Step Process:
-
Initial Cleaning:
Wash and dry the surface completely. -
Assess Scratch Depth:
If you can barely feel the scratch with your fingernail, start with a polishing compound. If you can definitely feel it, proceed with light wet sanding. -
Light Wet Standing (if needed):
-Soak 1000-grit sandpaper in water for 10 minutes.
-Gently sand the area in one direction while keeping it wet.
-Rinse and switch to 2000-frit, sanding in the opposite direction.
-Dry the surface thoroughly.
-
Apply Polish:
Use a microfiber pad with polishing compound. Rub in circular motions until the haze disappears. -
Buff and Finish:
Buff with a clean cloth until glossy. Repeat polish if faint lines remain.
Pro Tip: Always test sanding on a small, hidden area first. Acrylic can thin out quickly if over-sanded.
How to Polish Acrylic with Heavy Scratches
Heavy scratches are deeper and more noticeable, often caused by dragging objects, impact, or improper storage. These require more time and patience.
Materials You’ll Need:
- Wet/dry sandpaper: 600, 800, 1000, 2000, 4000 grit
- Water bowl for soaking sandpaper
- Acrylic polishing compound (Novus #3
- Heavy Scratch Remover)
- Microfiber cloths
-
Optional: Low-speed power buffer
Step-by-Step Process
-
Clean and Prepare:
Wash the surface to remove any dust. Dry completely before sanding. -
Start Wet Sanding:
-Begin with 600-grit sandpaper.
-Keep it soaked in water at all times.
-Sand the scratched area in straight, even strokes (not circular).
-Keep the surface wet to prevent heat buildup.
-
Progressively Refine:
-Move to 800-grit, then 1000, 2000, and 4000-grit, changing direction with each grit.
-Rinse between each sanding stage. -
Polish the Surface:
Apply Novus #3 with a microfiber pad, rubbing in firm, circular motions. The polish will fill micro-scratches and restore smoothness. -
Finish and Buff:
Switch to Novus #2 or Brillianize to complete the polishing cycle. Buff the surface until fully transparent.
Warning: Don’t use a high-speed buffer on acrylic — friction can cause melting or swirl marks. Always work at low speed and check progress frequently.
How to Polish Acrylic with Deep Scratches
Deep scratches are gouges that penetrate the acrylic layer or cause distortion. At this stage, you’re dealing with damage that may not fully disappear with basic polishing — but can still be improved significantly.
Materials You’ll Need:
- Wet/dry sandpaper (400 → 12000 grit range)
- Water spray bottle
- Polishing compounds (Novus #3 → Novus #2 → Novus #1)
- Electric buffer with soft pad (optional)
- Acrylic repair kit (for filling deep grooves)
-
Masking tape (for surrounding protection)
Step-by-Step Process:
-
Clean and Mask Off Surroundings:
Wipe the entire surface clean. Use masking tape around the scratch to protect unaffected areas. -
Repair Deep Gouges (if needed):
-If the scratch is deep enough to catch a fingernail, fill it using an acrylic repair compound or resin filler.
-Apply in thin layers, letting it cure completely before proceeding. -
Aggressive Sanding Sequence:
-Start with 400-grit wet sandpaper and sand carefully to level the filler and surrounding area.
-Move through 600, 800, 1200, 2000, 4000, 8000, and 12000-grit, keeping the area constantly wet.
-This process smooths the surface gradually without distorting transparency.
-
Multi-Stage Polishing:
-Apply Novus #3 to remove sanding marks.
-Follow with Novus #2 for fine polishing.
-Finish with Novus #1 for anti-static shine.
-Use a soft microfiber pad or low-speed buffer in overlapping circles. -
Final Buff and Inspect:
Wipe off residue and inspect under bright light. If clarity isn’t fully restored, repeat fine polish layers instead of re-sanding.
Pro Tip: Deep scratch restoration can take time — patience and consistent layering produce the best results. If distortion remains, professional refinishing may be needed.
How to Polish Acrylic Furniture at Home
Whether it’s an acrylic coffee table, chair, or display case, these tips apply to most household acrylic pieces.
Acrylic Tables and Countertops
- Clear the surface of all objects before polishing.
- Use non-abrasive polish to prevent new scratches.
-
Always polish in soft, overlapping circles.
Acrylic Chairs and Decor Pieces
- Focus on curved areas using a soft applicator pad.
- Avoid pressing too hard on edges or corners.
-
Polish both sides for transparent items like dining chairs or side tables.
Common Mistakes to Avoid When Polishing Acrylic
Even small errors can cause lasting damage. Here are the most frequent mistakes to avoid:
- Using harsh chemicals – Cleaners with alcohol, acetone, or ammonia can crack the surface.
- Skipping the cleaning step – Dust particles can cause micro-scratches when rubbed.
- Applying too much pressure – Acrylic softens easily with friction.
- Polishing under direct sunlight – Heat can cause warping or clouding.
-
Using paper towels or cotton rags – These are abrasive compared to microfiber cloths.
Maintaining the Shine: How to Keep Acrylic Looking New
After polishing, maintenance is key to keeping your furniture crystal clear for years.
Daily Care Tips
- Dust gently using a clean microfiber cloth.
- Avoid placing sharp objects directly on the surface.
-
Use coasters, mats, or placemats to prevent surface marks.
Weekly and Monthly Cleaning
- Wipe surfaces with mild soap and water weekly.
- Reapply acrylic cleaner monthly to maintain its anti-static coating.
-
Avoid prolonged UV exposure by keeping acrylic furniture away from windows when possible.
When to Call a Professional
If you’ve followed all steps but your acrylic furniture still looks hazy or scratched, professional restoration may be necessary.
Experts use industrial-grade polishing compounds and mechanical buffers to restore large or severely damaged surfaces.
Tip: Look for certified acrylic restoration services or contact your furniture manufacturer for maintenance recommendations.
Recommended Acrylic Polish Products
Here are some well-reviewed products trusted by professionals and DIY users alike:
|
Product |
Type |
Ideal For |
Available At |
|
Novus Plastic Polish Kit (#1–3) |
Multi-step system |
Light to deep scratches |
NovusPolish.com |
|
Brillianize Acrylic Cleaner & Polish |
One-step cleaner |
Regular maintenance |
Amazon.com |
|
Meguiar’s PlastX Clear Plastic Cleaner |
Fine scratch remover |
Automotive & furniture use |
Meguiars.com |
Eco-Friendly Alternatives for Polishing Acrylic
If you prefer to avoid commercial products, here are natural options for mild cleaning and shine restoration:
- Baking soda paste: For minor surface dullness (test on small area first).
- Olive oil: Lightly buff to restore temporary shine.
-
White vinegar and water mix: Mild cleaning without harsh chemicals.
While these methods work for surface cleaning, professional acrylic polish is still recommended for deep restoration.
How Often Should You Polish Acrylic?
For furniture in regular use (like tables or chairs), polishing every 3–6 months helps maintain clarity and prevent buildup.
For decorative pieces or rarely used items, once a year may be enough.
Regular cleaning is more important than frequent polishing. Keep surfaces dust-free to minimize scratches.
Acrylic vs. Glass: Which Is Easier to Polish?
Acrylic is easier and safer to polish than glass because it’s softer and more flexible.
While glass requires special diamond compounds and can chip easily, acrylic can be restored using basic household tools.
That’s one of the reasons acrylic furniture has become so popular in modern interior design — it combines elegance with practicality.
FAQs About How to Polish Acrylic
1. Can I use household polish or wax on acrylic furniture?
No. Traditional furniture polishes or car waxes often contain solvents, silicones, or alcohol, which can react with acrylic and cause haze or surface cracking. Instead, always use acrylic-safe polishes specifically designed for plastics — such as Novus, Brillianize, or Meguiar’s PlastX. These formulas clean and shine without chemically degrading the material.
2. What’s the difference between cleaning and polishing acrylic?
Cleaning removes surface dirt, fingerprints, and dust, while polishing restores clarity and smoothness by refining the acrylic’s surface. Think of cleaning as your daily or weekly maintenance, and polishing as your occasional deep restoration routine. Polishing physically smooths out micro-scratches that cleaning alone can’t fix.
3. How often should I polish my acrylic furniture?
The frequency depends on how much use your furniture gets. For high-touch pieces like tables or display cases, polish every 3 to 6 months. For decorative or less-used items, once a year is typically enough. Over-polishing can wear down the acrylic layer slightly over time, so consistency is better than frequency.
4. Can toothpaste or baking soda be used to polish acrylic?
These household items can work only for extremely light surface marks — but they must be used with caution. Baking soda and toothpaste are mildly abrasive, which means they can worsen the damage if used aggressively. If you try this method, dilute them into a soft paste and apply with gentle pressure using a microfiber cloth, then rinse thoroughly. For anything beyond faint scuffs, professional acrylic polishes remain the safer option.
5. Why does my acrylic still look cloudy after polishing?
Cloudiness usually means there’s residual polish or cleaner left on the surface, or the acrylic was overheated from excessive friction during buffing. To fix this, clean the surface with warm soapy water, rinse well, and re-buff gently using a dry microfiber cloth. If cloudiness persists, switch to a finer polishing compound or finish with a dedicated acrylic cleaner to restore full transparency.
6. Is it safe to use a power buffer when polishing acrylic?
Yes, but with extreme caution. Acrylic can melt or deform from high-speed friction, so always use a low-speed setting (under 1,200 RPM) and a soft foam pad. Keep the buffer moving constantly and avoid pressing down too hard. For beginners, hand polishing is often safer and gives you better control.
7. Can I polish colored or frosted acrylic the same way as clear acrylic?
Polishing methods are similar, but be gentler with colored, frosted, or matte-finish acrylics. These finishes have delicate surface treatments that can be dulled by over-polishing. Use only mild acrylic cleaners and fine-grade polishing compounds to preserve the color depth and texture. Avoid sanding unless absolutely necessary.
8. How do I remove static and dust after polishing?
Acrylic naturally builds up static electricity, especially right after polishing. To minimize dust attraction, finish your process with an anti-static acrylic cleaner or spray. You can also lightly mist the air around the furniture before wiping it down — this neutralizes static and keeps your polished surface clear longer.
9. Is there a way to prevent scratches without constant polishing?
Yes! Prevention is easier than restoration. Use soft mats, rubber bumpers, and felt pads under decorative objects. Avoid stacking acrylic pieces directly, and store unused items in protective fabric sleeves or covers. Keeping your surfaces dust-free and cleaning only with microfiber cloths significantly reduces the need for frequent polishing.
10. What’s the most important rule to remember when learning how to polish acrylic?
Always go slow, gentle, and progressive. Acrylic polishing is a gradual process — rushing it or applying heavy pressure can cause more damage than it fixes. Focus on maintaining control, using the right materials, and stopping often to check your progress under good lighting. Patience and precision are the true secrets to achieving a flawless, glass-like shine.
Final Thoughts
Knowing how to polish acrylic empowers you to protect and restore your furniture with confidence. Whether you’re dealing with light swirl marks or deep surface scratches, patience, the right tools, and proper technique make all the difference.
But polishing is only part of keeping your acrylic furniture in top condition — cleaning it the right way is just as important. The best way to clean acrylic is to use a soft microfiber cloth and a solution of mild dish soap mixed with warm water. Gently wipe the surface in circular motions to remove dust and residue, then dry with a clean microfiber towel. This prevents water spots and maintains clarity.
If you’re wondering how to clean acrylic without scratching, the secret is to avoid abrasive materials and harsh chemicals. Never use paper towels, scouring pads, or cleaners that contain ammonia or alcohol, as these can cause tiny scratches or surface haze. Instead, always stick to non-abrasive cloths, gentle cleaners designed for acrylic (like Brillianize or Novus #1), and light pressure during cleaning.
Acrylic furniture doesn’t just add elegance — it reflects light, enhances space, and defines modern design. When you combine proper cleaning with regular polishing, your acrylic pieces will stay crystal clear, scratch-free, and stunning for years to come.