
Best Acrylic Scratch Removers for Furniture and Décor
Aetheris Concepts Editorial TeamBest Acrylic Scratch Removers: Top Solutions & How to Use Them
If you have acrylic furniture or decor, you’ve probably faced the frustrating moment when you notice a scratch across a clear acrylic surface. In this article we’re going to cover everything you need to know about choosing and using the best acrylic scratch removers to restore those surfaces to clarity and shine.
We’ll start by explaining what acrylic is, why it scratches easily, and then move into how scratch removers work, what to look for when selecting one, how to properly apply them, and finally our recommended products with detailed reviews. Along the way we’ll address common questions and pitfalls so you can confidently restore your furniture or décor.
Why Acrylic Scratches & What That Means for Your Furniture
Acrylic is a popular material for furniture and home décor—clear acrylic (often marketed as “lucite”, “plexiglass”, or “acrylic glass”) gives you clean lines, transparency, and a modern look. But one trade‐off is that it scratches more easily than glass or metal coatings.
Here are some reasons why:
- Acrylic surfaces are softer than glass, so even light abrasion (dust, grit, wiping with a rough cloth) can leave micro-scratches.
- Transparent acrylic surfaces show scratches more clearly because the defects affect how light passes through or reflects.
- Over time, multiple fine scratches accumulate, which make the surface look cloudy or hazy rather than clear.
- Some cleaning methods (ammonia-based cleaners, rough sponges, harsh chemicals) can make things worse.
- Also, it is very important to check compatibility: some products for acrylic are not safe for other plastics like polycarbonate.
What this means for your furniture & decor:
- If you have an acrylic table top, display case, acrylic shelving or decorative item, scratches can compromise the aesthetic and make cleaning harder.
- By using the best acrylic scratch removers, you can restore clarity, slow the scratching process, and extend the life of your piece.
-
However, you need to use the right product and follow safe methods—incorrect use can cause further damage or haze the surface.
How Acrylic Scratch Removers Work
Understanding how these products work helps you pick wisely and use them effectively. Generally, scratch removers for acrylic operate in one or more of these ways:
- Abrasive polishing / buffing – The product contains mild abrasive particles that gently remove the top layer of acrylic around the scratch, so the scratch depth is reduced and the surface becomes smooth.
- Restoration of clarity – After abrasion, the surface is polished to restore gloss and make the area transparent again. Many kits include a “finish polish” step.
- Protection & filling micro-imperfections – Some products may include protective elements or fillers that prevent future scratching (though not all claim this).
- Surface compatibility – The best products ensure they don’t damage coatings, printed surfaces or other vulnerabilities.
Key takeaways for you as a home-decor user:
- Light scratches (that you can feel but not easily see) are often handled by fine polish; deep gouges may require more aggressive sanding first.
- Always clean the surface well before applying the scratch remover—dirt or grit will cause new scratches.
- Use a soft cloth or microfiber pad; apply moderate pressure in circular or cross-grain motions as instructed.
- After treatment, buff and clean thoroughly.
-
Test in a small, inconspicuous area first—especially if your acrylic has coatings or is part of furniture that may have special finishes.
What to Look for in the Best Acrylic Scratch Removers
When you’re shopping for a scratch remover for your acrylic furniture or décor, here are the features and criteria you should evaluate:
A. Compatibility with acrylic and your specific piece
- Ensure the product is explicitly labelled for acrylic (PMMA) or plexiglass.
- If your piece has a coating, print or film (e.g., UV-coating, special finish), check that the product is safe for coated plastics.
-
If the piece is polycarbonate or has mixed materials, verify compatibility.
B. Level of scratch you are dealing with
- Light surface scratches: require mild polish or fine abrasive.
- Medium scratches: you might need a scratch remover kit with multiple steps.
- Deep scratches/gouges: may require sanding (wet sanding steps) before using a polish.
-
If you pick a product that is under-powered for deeper scratches, you risk incomplete repair or widening the area.
C. Kit vs single bottle
- Kits are useful because they bundle multiple stages (abrasive step, fine polish, finishing polish).
-
A single-bottle product may suffice if you only have mild scratches or are experienced.
D. Ease of use & instructions
- Does the product come with applicators, cloths, pads, or just the polish?
- Are instructions clear for home use?
-
Are special tools (e.g., orbital sander) required for deeper scratches? If so, is that realistic for your furniture use case?
E. Finish result & performance
- Reputation & reviews matter. Are there before/after photos?
- Do manufacturers provide guarantee of clarity restoration?
-
Also beware: over-aggressive removal can reduce thickness or cause haze.
F. Safety & practical considerations
- Is the polish abrasive? Will it remove coatings?
- Ensure you have proper ventilation and protection if chemical strong.
-
For vertical or display furniture surfaces, choose a product that doesn’t drip or run.
G. Price and availability
- Evaluate cost vs performance; some premium kits may cost more but save you from replacement.
-
Availability in your region matters—local stock, shipping, and shipping cost.
How to Use an Acrylic Scratch Remover Safely & Effectively
Here’s a practical, simplified guide you can follow. Adjust steps based on the severity of scratch and product instructions.
Step 1: Assess and prepare
- Identify the scratch: light, moderate or deep.
- Clean the surface thoroughly with a soft microfiber cloth and mild soap or recommended cleaner. Remove all dust/grit.
- Place the furniture/ item on a stable surface, ensure good lighting so you can see the scratch.
- If piece has coatings or is part of a larger assembly, protect surrounding areas (mask off).
-
Always test the product in a small, inconspicuous area first.
Step 2: Apply the scratch remover
- If using a multi-step kit (abrasive → fine polish → finish), follow in sequence.
- Apply a small amount of product to a soft cloth or pad as instructed.
- For light scratches: use light pressure, work in circular or cross-grain motion for 1-2 minutes.
-
For deeper scratches: you may need more pressure and longer time or even dry/wet-sand first.
Step 3: Handle deeper scratches if present
- If the scratch is deep (you can feel a ridge, or it catches your nail), you may need to sand it first.
-
After sanding, clean off debris, then apply the polish step to restore gloss.
Step 4: Buff and finish
- After polishing, remove any residue with a clean damp cloth, dry the surface. Some kits include a “finish polish” that you apply lightly to restore shine.
- Inspect surface in good light—if scratches remain, you may repeat the polish step.
-
Clean again and consider applying a protection (if recommended) or using dust-free soft cloth going forward.
Step 5: Maintain your acrylic furniture
- Use only microfiber or very soft cloths for cleaning—avoid rough sponges.
- Use mild, non-ammonia cleaners; avoid abrasive cleaners.
- Dust regularly; avoid letting grit accumulate.
-
Use placemats, coasters or felt pads under objects on an acrylic table to reduce risk of future scratching.
Safety & Additional Tips
- Work in a well-ventilated area, especially if polish has solvents.
- Protect surrounding surfaces and furnishings—some polish may splash or smear.
- If your furniture is vertical (like a display cabinet door) be careful not to drip polish or leave streaks—work small areas at a time.
-
For pieces with coatings or films, double-check compatibility before proceeding.
Top Product Picks for the Best Acrylic Scratch Removers
Here are several highly regarded products that meet the criteria above and are effective for restoring acrylic furniture and décor surfaces. Each of these is suited for acrylic (PMMA) and many have kits or multiple steps for varying scratch severity.
Here is a brief commentary on each:
-
NOVUS Plastic Polish Kit: A widely trusted kit for acrylic/plexiglass surfaces. Contains multiple stages (heavy scratch, fine scratch, cleaner/polish). Ideal for furniture where you might encounter a range of scratch depths.

-
QUIXX Acrylic Scratch Remover: German-made kit specifically for acrylic and Plexiglas surfaces, including furniture, boats and transparent panels. Good for serious scratch jobs; includes abrasive sanding strips and polishing cloths.

-
Polywatch Plastic Polish Kit: Originally for small plastic watch crystals, but can work on small acrylic surfaces or furniture edges. Great budget choice for light scratches.

-
G3 Pro Scratch Remover Paste: A general scratch remover paste that may work on acrylic surfaces—good as supplementary product if you already own it, but ensure compatibility with acrylic.

-
Scratch‑Dini Scratch Remover: A less-common brand but decent option for targeted spots. Suitable for smaller furniture décor items rather than full large surfaces.
-
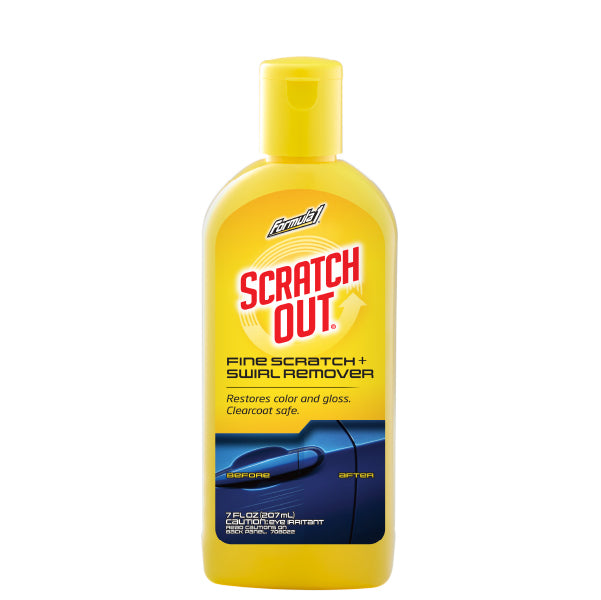
Formula 1 Scratch Out Fine Scratch + Swirl Remover: Primarily a car paint scratch remover but can work for shallow acrylic scratches—use with caution and check compatibility.

Which to pick for what scenario?
-
For large acrylic furniture surfaces (table tops, shelving): choose a robust kit like Novus or QUIXX so you have multiple stages.
-
For small décor items, display panels, or occasional light scratches: Polywatch/Annap will often suffice.
- For very light minor scratches or for maintenance: simpler paste may work, but double-check it’s safe for acrylic and not just designed for metal/glass.
Common Mistakes & How to Avoid Them
Here are some common mistakes when using scratch removers and how you can avoid them:
-
Mistake: Skipping cleaning and applying polish over grit/dust → leads to grinding more scratches.
Fix: Always clean and remove all debris before starting.
-
Mistake: Using too coarse an abrasive or sanding wrong direction → causes swirl marks or cloudiness.
Fix: Follow manufacturer instructions, use correct grit progression, keep surface wet if sanding.
-
Mistake: Treating a coated or printed surface with standard polish → may damage finish.
Fix: Verify compatibility; test in inconspicuous area; if unsure, consult original furniture maker.
-
Mistake: Polishing too aggressively on thin acrylic - risk of thinning or distortion.
Fix: Work in controlled manner; for large furniture panel, consider professional.
-
Mistake: Neglecting maintenance after restoration → result degrades quickly.
Fix: Adopt good cleaning habits and protective measures (felt pads, soft cloths, avoid dragging objects).
-
Mistake: Treating large area in one go and losing control.
Fix: Work section by section; check result periodically.
Maintenance Tips: Prolonging Clarity and Minimizing Future Scratches
After restoring your piece with one of the best acrylic scratch removers, the next step is keeping that crystal-clear finish intact. Proper care—especially learning how to clean acrylic without scratching and how to polish acrylic periodically—prevents new marks from forming and maintains long-term brilliance.
Here’s how to preserve that flawless look:
- Clean gently and often. Use a soft microfiber cloth for regular dusting. Avoid paper towels, rough pads, or brushes that can create micro-abrasions.
- Use mild soap or acrylic-safe cleaners. Mix a few drops of dish soap with warm water, or choose a cleaner designed for plastics. Avoid ammonia-based or high-alkaline formulas, which can cloud or etch acrylic.
- Polish occasionally for clarity. When you notice light haze, apply a fine acrylic polish or a few drops of a scratch-remover formula. This “maintenance polish” helps keep the surface smooth and glossy.
- Protect high-touch surfaces. Place felt or rubber pads beneath décor or electronics, and always lift—never slide—objects on tabletops or shelves.
- Minimize dust and grit. Even tiny particles can act like sandpaper over time, dulling the surface.
- Inspect regularly. Under good lighting, check for early signs of wear or haze and treat immediately before they worsen.
-
Avoid heat and abrasion. Keep hot cookware, sharp tools, and coarse materials off acrylic furniture.
By combining proper cleaning habits with periodic polishing, you’ll maintain the clarity and elegance of your acrylic furniture for years—without constantly needing to reach for a scratch remover.
Final Words: Restore Clarity, Extend Life
Acrylic furniture and décor bring elegance and modern flair to your home—but their susceptibility to scratching means you’ll need the right care and restoration method. By choosing one of the best acrylic scratch removers, applying it correctly, and maintaining the surface carefully, you can restore and preserve the crystal-clear appearance of your acrylic furniture for years.
Whether you’ve got a large dining-table acrylic top, a display case, shelving, or decorative panels, the methods and products here will help you confidently tackle scratches. Start with an assessment, pick a compatible product for your scratch depth and material, follow the usage steps, and adopt good maintenance habits. With that approach, you’ll avoid replacing expensive pieces unnecessarily—and keep your acrylic furniture looking like new.